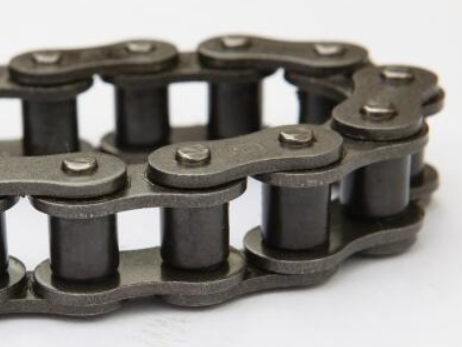
Installation of Roller Chain Drive System
The installation of a roller chain drive system plays a crucial role in the system’s performance and longevity. Proper alignment, tensioning, and maintenance of the components are essential for the efficient operation of the chain drive. Below is a comprehensive guide on how to install a roller chain drive system.
1. Inspect Components Before Installation
Before installing the roller chain drive, it is important to check the condition of the key components, including shafts, bearings, sprockets, and the chain itself.
- Shafts and Bearings: Ensure that the shafts and bearings are in good condition, with no visible damage or excessive wear. The bearings should be installed securely in their proper positions.
- Chain: If the chain is not new, check its cleanliness, lubrication, and wear condition. If the chain is excessively worn, it should be replaced.
- Sprockets: Inspect the sprockets for any damage or excessive wear on the teeth. The teeth should be in good condition for smooth engagement with the chain.
2. Align the Shafts and Sprockets
Proper alignment of the shafts and sprockets is essential to ensure smooth operation and prevent uneven wear on the chain and sprockets.
- Shaft Parallelism: Ensure that all shafts are parallel and in the same plane. This can be done using a spirit level and measuring rods. For most single-strand roller chains, the allowable parallelism tolerance is 4.2 mm/m per meter of shaft length.
- Sprocket Alignment: When installing the sprockets, ensure that the side faces of the sprocket teeth are aligned with each other. This can be checked using a straightedge or a thin rod. The maximum allowable misalignment should not exceed 0.045 times the chain pitch (p).
3. Install the Chain
Once the shafts and sprockets are aligned, it’s time to install the chain. Follow these steps:
- Connecting the Chain: The chain should be installed so that the pins are properly engaged with the bushings. If the chain is too long, you can shorten it by removing a few links, or if it’s too short, you can add a few links.
- Positioning the Chain on the Sprockets: For small-pitch chains, position the two ends of the chain in adjacent grooves of the sprockets. For larger or multi-strand chains, use a tensioning tool to prevent the sprockets from rotating and ensure the chain links are properly engaged. Once the chain is in position, connect the chain ends using a connecting link, and secure it with retaining clips or locking pins.
- Locking the Connecting Link: Ensure that the open ends of the retaining clips or locking pins face away from the direction of chain movement to prevent them from coming loose due to shock loads or vibrations. In heavy-duty applications, closed retaining clips or locking pins are recommended for greater security.
4. Adjust the Chain Tension
Proper chain tension is critical to ensure smooth operation and prevent excessive wear on the chain and sprockets.
- Tension Adjustment: After the chain is installed, rotate one sprocket to tighten one side of the chain. Use a ruler and a scale to measure the displacement of the slack side of the chain. For horizontal or slightly inclined drives, the displacement of the slack side should be 4% to 6% of the center distance between the two sprockets. For drives with a large inclination angle or high shock loads, the displacement should be reduced to 2% to 3%.
- Methods for Adjusting Chain Tension:
- Center Distance Adjustment: Adjust the center distance between the sprockets to maintain proper chain tension. The recommended center distance adjustment for roller chains is typically 2 times the chain pitch.
- Chain Length Adjustment: If the center distance cannot be adjusted, the chain length can be modified by adding or removing links to account for chain elongation.
- Using Tensioning Devices: In some cases, additional tensioning devices (such as tensioning rollers) are required. These devices can be automatic (using springs or weights) or manually adjusted (using threaded bolts or other mechanisms).
5. Install Tensioning Devices
In certain situations, tensioning devices may be necessary to ensure the proper tension of the chain and prevent issues such as excessive sag, poor meshing, or vibration.
- When to Use Tensioning Devices:
- When the center distance between shafts is large (greater than 50 times the chain pitch) or under pulsed loads.
- When the center distance is small and the slack side of the chain is positioned above.
- When the centerline of the sprockets has an angle greater than 60°.
- When it is necessary to reduce shock loads, avoid resonance, or increase the sprocket engagement angle.
Tensioning devices are usually installed on the slack side of the chain, near the smaller sprocket. These can be either toothed sprockets or smooth idler rollers. The diameter of the tensioning roller is typically close to the diameter of the smaller sprocket.
6. Final Check and Test Run
After installation, perform a test run of the entire chain drive system to ensure it operates smoothly. Pay attention to any abnormal sounds, vibrations, or issues with chain slack. If any problems are detected, recheck the alignment, tension, and locking of the components. Ensure that the chain runs freely without excessive slack or friction.
Conclusion
Installing a roller chain drive system requires careful attention to detail, including inspecting components, ensuring proper alignment, adjusting chain tension, and using appropriate tensioning devices. Proper installation not only ensures the efficient operation of the drive system but also helps to extend the lifespan of the components. Regular maintenance and timely adjustments are key to maintaining the system’s reliability and performance over time.

